

In the midst of cold and flu season, it’s never a bad idea to have certain items in your pantry to help you stay well. I’m no expert or health coach, but I’m proud to say that haven’t had a cold in several years.
I’m convinced that the last cold only happened because I forgot to wash my hands after a trip to the store and post office, since I’d been cold-free for many years before that. I believe in natural prevention rather than treatment, and I also believe that food can be medicine.
Now I’m not claiming that I never feel “like I’m coming down with something,” because sometimes I do. West Texas dust storms and juniper pollen always get me down. My go-to for those days involves doses of high potency Vitamin C, and as many mugs as I can drink filled with hot water, a slice of lemon, at least a tablespoon of organic apple cider vinegar and a tablespoon of organic local honey.

My adult daughter will attest to the fact that throughout childhood, I made her drink many a mug at the first sign of a thick throat or tickly cough. Nine times out of ten, it was cleared up in less than two days, no need for anything else to treat her. She keeps honey and apple cider vinegar in her own pantry now.
Drinking one to two tablespoons of apple cider vinegar mixed with water each day can boost your health. Beware that more than one tablespoon at a time causes nausea for some people.
Your body needs to be slightly alkaline to heal itself, and apple cider vinegar helps alkalinize you. Many diseases, as well as viruses, bacteria, yeast, mold and fungus, cannot survive in an alkaline body. Honey fights microbes and doesn’t allow bacterial growth. That’s why the mug of apple cider vinegar, honey and alkaline lemon knocks the cold virus on its heels.
On a whim one day during my last cold – and I mean the very last cold I had several years ago, I made a purchase that changed everything. I was foggy-headed and sickly, not wanting to buy any conventional over-the-counter medications. Instead, I bought a bottle of elderberry syrup and a package of lozenges with zinc and elderberry. After two doses of syrup and three lozenges, I was feeling better. Two days later, I was well.
While there are many nay-sayers regarding the benefits of elderberries, I’m a firm believer. Elderberries have been a known treatment for coughs, colds and mild flu symptoms for thousands of years.
The benefits of elderberries are many. Not only do they boost the immune system, they fight and protect against bacterial infections and viral infections; reduce the symptoms and duration of a cold or flu; help clear sinus infections; ease symptoms of allergies, and they are high in antioxidants and high in vitamin A, which makes it great for healthy skin. Why would you not have this in your arsenal to fight the bugs of the season, or any time?
Elderberry products can be expensive, and there are many to choose from. Making your own syrup is not expensive, and worth every cent either way. There are lots of different recipes with added ingredients like cinnamon, ginger and cloves, but I like to keep it simple. I bought my whole dried elderberries at Blue Water Natural Foods in Alpine for under $4 per batch of syrup.
Homemade elderberry syrup doesn’t become as thick as the store bought version because it uses less sugar and no preservatives or thickeners, so don’t be alarmed if the final syrup has a more liquid consistency. If you want thicker syrup, cook it down for an additional 10-15 minutes. This elixir keeps in the refrigerator for six months.

There is no standard dose of elderberry syrup. Some studies have used 1 tablespoon of an elderberry syrup extract four times a day, and that worked for me. Don’t forget to wash your hands often. Be well, y’all!
Elderberry Syrup
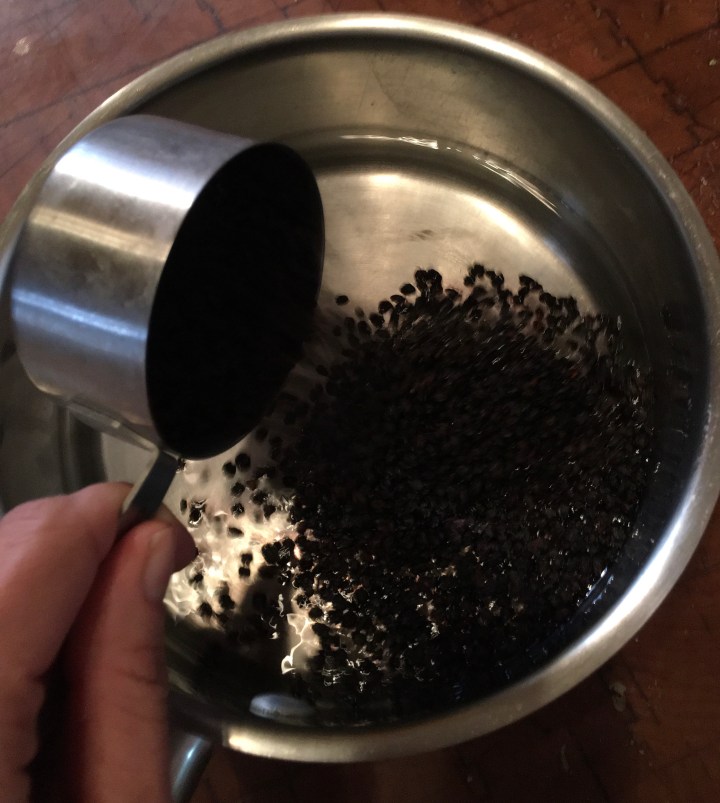
1/2 cup dried elderberries
2 cups water
1/2 cup honey
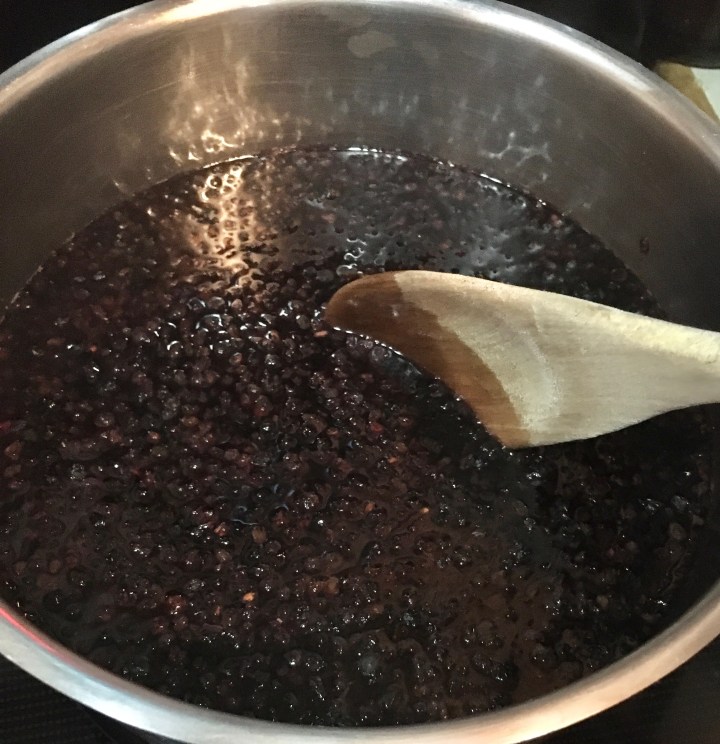
Combine elderberries and water in a small saucepan over high heat and bring the mixture to a boil. Lower the heat and allow the mixture to simmer until the water has been reduced by half, about 20 minutes.
Transfer the cooked berries and liquid to a clean bowl and pour it through a fine mesh strainer to remove the berry skins. Use the back of a spoon to press on the berries in the strainer, to extract all of the juice, then discard the small amount of pulp left in the strainer.
Cool the elderberry juice to room temperature, so that the heat doesn’t harm the nutrients in the honey, then stir in the honey. Use a whisk to incorporate it smoothly, then transfer the syrup into a sealed glass jar that you can store in the fridge.
